Friday, January 29, 2010

Building a Chicken Coop - Part 1

Hatching eggs has lead me to a tricky situation. While I don't want to count my chickens before they hatch, I do want to be prepared for chicks if they do arrive. Like many other things, chicken coops sell for too much on trademe in my opinion. So I've decided to start building a chicken coop. Maybe if I get around to it I might be able to build a few extra to sell and lower the average price of coops on trademe.

So this is part one of my chicken coop building antics.

Here is my current chicken coop and run which houses my shaver hens.

Chicken Coop
My current chicken coop and run.

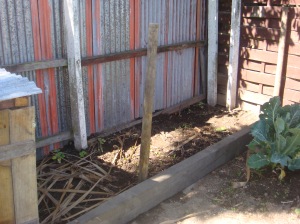
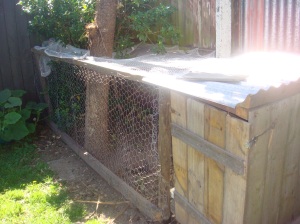
Here is the area where I will make my second chicken run, you can see I've begun work by laying down a large beam of pine and a couple of round uprights. I'll attach some netting to the front of this and perhaps a door on the left so I can get in to clean and add water.

New Chicken Coop
The area reserved for my new chicken run which is dangerously close to the vegetable garden!

I plan to modify my existing coop which is big enough to house more than the current two chickens. In order to keep the chickens apart rather than disrupting the pecking order, I'll probably make it two story, and give the new arrivals the bottom floor. I made the mistake of allowing my first chickens to sleep where they lay, so they'll probably do that for the rest of their lives. I won't make the same mistake with the new chickens, who will have ample perching space.

Current Chicken Coop
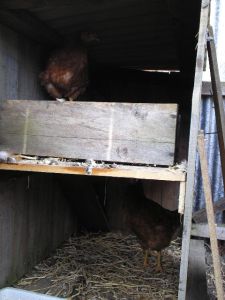
The chicken coop that my girls are currently using. They are much younger in this picture than now.

Good luck if you're building a coop. The good thing about chickens is they're not at all fussy, you can house them just about anywhere. Buying an expensive coop may make you feel better, but they won't thank you for it!

I'll post part two shortly which will hopefully include pictures of the finished coop and run, modified for its future occupants. Hopefully you're inspired to build your own chicken coop now, rather than paying all your hard earned pennies to someone on trademe!

Incubating Chicken Eggs

Incubating eggs is something that everybody should do at least once. That’s why I feel deprived – I’ve never done it before! My interest in incubating eggs lead me to google some simple designs for home made incubators, although most of them I couldn’t make due a lack of parts. The website that I consulted was written close to 10 years ago and it said I could make one for just under US$10. Well I didn’t achieve that, but after splashing out for a $28 thermometer I did manage to make mine for around $35. You can check my other posts for instructions on making your own incubator to hatch chicken, duck, quail, guinea fowl and maybe even peacock eggs. Although you may want to wait until you see a post here titled something like “success with my first batch”! (-updated)
My eggs are at day 13 now. I’ve been candling them most nights since about day 5 to check their progress. When you candle the egg at day 13, you pretty much just see a big black portion of egg and an air sack. The reward comes when you see the big black part move, it’s amazing! And to think that this came from a normal egg, in just 13 days under the heat – wow.

Tips for incubating eggs

  • Keep the temperature even, but don’t worry too much about slight deviations as long as they’re both up and down. The eggs will hatch at the right time as long as the average temperature was around 37.5C (99.5F) and the extremes didn’t kill the embryo. Mine got to 39.8C at one point, but have still shown normal development. For the most part I haven’t let them drop below 36C or rise above 39C
  • Candle regularly. Candling is when you get to see what is actually going on, it’s like an x-ray of the egg, or equivalent to an ultra sound of a baby but using light instead. To candle you need to be in a dark room. Shine a light through the egg and you will see what is going on inside. At day 3 or 4 you’ll see some veins, at day 5 or 6 you’ll see the chick’s eye – a little black spot in the egg. At day 13 I’m starting to see a growing black shadow across the egg that moves sometimes. You can candle as many times as you like without hurting the chick development, as long as you’re gentle and don’t let the temperature drop too low. I use a desk lamp with a small box over it. The box has a small hole where I put the egg.
  • Turn the eggs two or three times a day. The embryo can get stuck to the shell if it’s not turned regularly. Apparently the hen will turn the egg around 99 times per day in the process of sitting on her clutch of eggs. Two times is a minimum for incubator eggs, and three times is recommended as this means they’ll be on a different side each night. Stop turning on the 18th day, as the chicken is getting into position for hatching and you don’t want to confuse the wee fella.
  • Keep notes. I keep notes of the temperature and humidity at each time I check, turn, candle or raise the humidity of my incubator. I want to know the differences between two hatches if I ever do this again. I want to know what I did right and what I did wrong. These notes will be very valuable at that point, so keep a pen and paper near your incubator to record what’s happening.
  • Check temperature regularly. I haven’t adjusted my thermostat for the last three days, but before that I was tweaking it often to try and get the right temperature at all times. I read on a commercial incubator (a hovabator) that you would need to check it at least three to four times a day. This is pretty labour intensive given that incubation period is 21 days. But it’s so important as you don’t want to cook your chicks.
Candling equipment
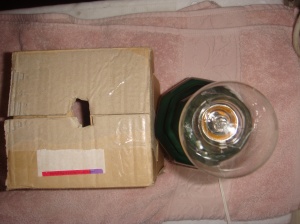
This is the box and lamp that I use to candle my eggs. Put the box on top of the light bulb, the egg on top of the hole in the box and all is revealed.
Those are all the tips I have for incubating your eggs at the moment. Visit BackYardChickens for more tips on incubation and their forums have some great pics of candling (some of the best I found). And good luck for your eggs if you decide to incubate!

Worm Farming

If you want to know how to keep worms then you’ve come to the right place. I’ve had worms for about three months now and I’m ready to start sharing them with others. I put them on trademe to thin out my population a bit and help someone else get started. Worms are another trademe item that sells for too much, in my opinion. I aee most auctions for tiger worms (aka red worms) starting at $23 or even $27 for 500 grams. Worms double their population every 6 weeks in the right conditions, and they don’t exactly eat caviar (unless that’s what you’re throwing into the compost bin after dinner!). They can be free to setup and will populate quickly. In other words, they should be nearly free to obtain by anyone.

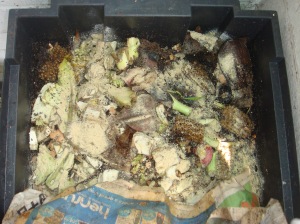
Worm farming bins

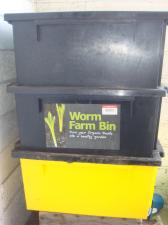
My worm farm has three bins: 1 for catching worm tea, and two to rotate the worms and collect the compost

What worms like to eat:

  • Fresh vegetable scraps
  • Fruit peels (except citrus)
  • Small amounts of hair
  • Coffee grinds and teabags
  • Avocado skins
  • Manure
  • Egg shells
  • Tissue paper
  • Leaves

What worms don’t like to eat:

  • Citrus
  • Onion peel
  • Meat (you’ll attract pests)
  • Dairy products
  • Lawn clippings in large quantities
  • Spicy food

Some common problems:

  • Worms are all going to the bottom of the pile:
  • Not dark enough, add carpet or newspaper on top
  • Lots of little white worms or flies:
  • Too acidic, add lime or newspaper or eggshells
  • Worms are trying to climb out the top of their housing:
  • Too wet, add strips of torn newspaper to soak up excess water
  • Worms are looking bloated or pale:
  • Too wet, add strips of torn newspaper to soak up excess water
  • The worm farm smells bad:
  • Too much food, food is decomposing rather than being eaten
Worm farm - adding lime

I've overfed my worm farm causing some food to rot so I need to add lime to get rid of the white worms and fruit flies.

Once the worms have gotten established they are going to increase in population according to the size of their home and food supply. Over time they will be able to consume more and more food scraps daily, and will be producing more and more of the good stuff for your garden. The two products you will be interested in are vermicast or castings, which is the stuff that the worms leave behind after they eat your scraps, and worm tea, which is the liquid which the worms deposit and will fill the container beneath your worm farm. Both of these are very rich fertilisers which will accelerate the growth of your plants.

Harvesting the Compost

Harvesting the worm castings involves migrating the worms to another area so that you can remove the compost without destroying your worm population. If you’ve bought a worm farm then it probably has more than one layer. This is so you can migrate your worms to the upper layer to harvest the lower.

To migrate the worms, simply put some bedding and food in the top layer and remove any carpet or newspaper at the top of the bottom layer so that worms can climb through. Once they have eaten all the food supply in the bottom layer they will climb up to the food source and you can remove the bottom layer with all the good compost in it. If it has some worms in it this is not a problem as they can go in the garden and still benefit you (or to the chickens!). Most of the worms will have moved up. If you don’t have an extra layer, you can also migrate your worms sideways to the left or right and harvest the compost on the other side of your container. This is how I manage my large worm farm.

Some worm farms have a tap at the bottom so you can just pour the worm tea into a container and apply it at a ratio of one part worm tea to ten parts water (1:10) and apply to your tomatoes or most prized plants. It’s best to do this straight away as there are lots of good bacteria in there which will die quickly.

Composting Basics

I was given a book about composting for Christmas by my brother. After reading all of about two pages I was hooked, and this is the first time I’ve been hooked on something that is telling me how wrong I have been my whole life!

Here is a quick list of things to do to make great compost:

  • Add lots of leaves to your compost pile – more leaves than anything else
  • Don’t add any large branches or sticks to your compost pile
  • Turn your compost pile over with a fork once a fortnight or month

If you just want to make great compost for your garden, follow these three tips. If you want to know more then read on.

Benefits of Composting

According to my book, composting well helps to control weeds, prevent plant disease, improve soil structure and improve crops. Three of those I can believe, but how does composting help to control weeds? Well I tried a load of compost from a local outlet here in Christchurch, and I’ve got to say it works. Plus I found the experience of buying dirt quite satisfying considering!

My garden has less weeds with it’s layer of compost for a few reasons.

  1. The compost has fewer weed seeds than the soil I put it on.
  2. The compost covers the weed seeds below preventing them from ever surfacing.
  3. Those that do surface are easier to pull out because of the improved soil structure. Even the longer rooted weeds come loose easily.

So that proves it for me – compost helps prevent weeds and decreases my weeding time.

NOTE: Probably the most instinctive way to deal with weeds is to turn the whole bed over with a tiller, rotary hoe, or fork. This is a bad idea. Try applying your compost to the top and when weeds appear pull them out without disturbing the soil too much. This way eventually all the seeds capable of germinating will be removed and you won’t be constantly turning up more seeds to the top. This is a tip from permaculture and the no-dig gardening method.

Why Leaves make good Compost

Leaves are the missing ingredient in most of the compost bins I know about. Basically everyone throws their grass clippings in the compost, and everyone throws their household rubbish in there. But composting requires a ratio of Carbon to Nitrogen, and these ingredients are all Nitrogen rich. This results in a rotting pile of rubbish rather than the good compost you buy from the shops. Leaves and other brown material provide the best source of Carbon and should be added in at least as great a quantity as the other stuff. If you mix them together real well your compost will be, as they say, black gold.

Methods of Composting

My favourite method of composting mentioned in my book, and tested in my back yard is to have two alternating compost heaps. Over the course of my compost’s life it will have been turned a couple of times, and shifted into a completely separate bin once. This ensures good airing of the decomposing matter and will speed up the process and prevent rotting. The stuff at the bottom will decompose the fastest and airing will help the pile get hotter, so moving from one bin to another really helps the process along.

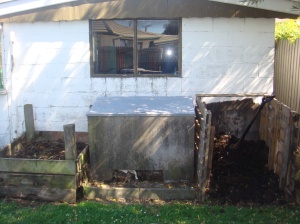
Compost bins

My compost bins on the left and right for oxygenating the compost. In the center is my larger worm farm.

Another method of composting is worm farms. I have two worm farms, one for our household which is right by the back door, and another much larger one for my work’s food scraps which I collect weekly. Worms take care of scraps faster than my compost heap and produce some very good by-products along the way. You can read my post on Worm Farming for more info on this approach.

One other method I use for composting is what I like to call “Chicken Rotation”. Simply by moving my chickens around the garden and throwing them food scraps I help to condition the soil for future planting. The soil is turned from dried out waste soil into nitrogen-rich soil with good structure where my vegetables will flourish next season. The chickens reinvest the goodness in their feed into the soil.

With Autumn on the way it’s a good time to start preparing for some leaf collection! I have three woolsacks ready for filling with some mulched leaves which I will add to my compost heap every time I add nitrogen rich matter over the winter through to summer months.

Good luck with your compost!